2020.04.23 [IoT] ESP-IDF Tools の Windows 10 環境へ導入メモ 公開した内容から最新環境への更新記録。IDE は使わず、コマンドプロンプトでの実施なので、#技術老害 コンテンツが嫌だ~!と思われる方は、どうぞタブを閉じて他のサイトへどうぞ。
2021.01.03 現在の内容です。
ESP-IDF とは
Espressif IoT Development Framework のこと。
ちなみに、Espressif は「エスプレシッフ」と呼びます。
ただし、ESP32 は「イー・エス・ピー・さん・にい」、ESP8266は「イー・エスー・ピー・はち・にい・ろく・ろく」です。日本以外の海外では Thirty-Two, Eigty-two, Sixty-six など二桁区切りで。
ESP をエスパーと呼ぶ方は「ネタ」だと思います。
それか、井の中の蛙大海を知らず。
インストーラに含まれるもの
事前導入が必要なものが無くても大丈夫です。インストーラが判断して、不足しているものはダウンロード&インストールを支援します。
次の5項目は自動インストールします。
- GNU Compiler Collection (GCC)
- GNU development tools (“binutils”)
- GNU Debugger (“gdb”)
- OpenOCD
- KConfig Frontends
ソースコードは次の場所から入手可能。
- https://github.com/espressif/crosstool-NG
- https://github.com/espressif/binutils-esp32ulp
- https://github.com/espressif/openocd-esp32
- https://github.com/espressif/kconfig-frontends
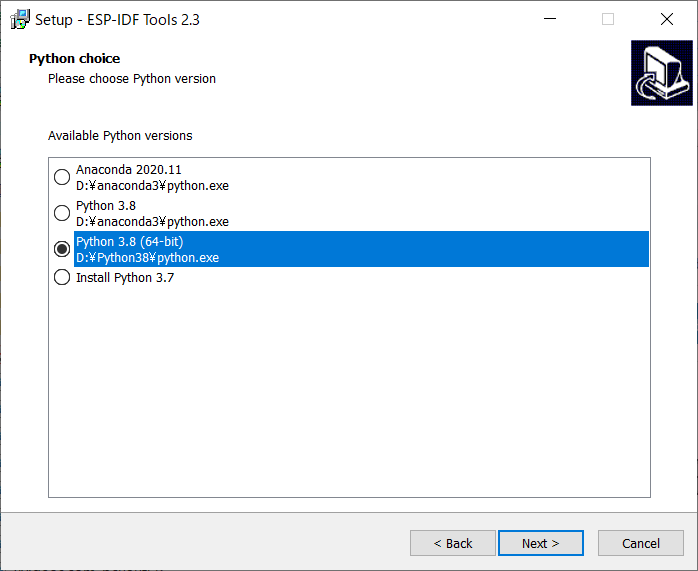
Python / Anaconda 環境をお持ちの方は python.exe が存在するPATH の選択または、Python 3.7 インスール可能です。ここでは既に導入済み Python 3.8 (64-bit) を指定しました。ESP-IDF は v4.1 (relase version)をあとで指定します。
—
★ESP-IDF リリースバージョンと ESP-IDF Tools バージョンは異なるので、混乱しないように★
バージョンについて:
https://docs.espressif.com/projects/esp-idf/en/latest/esp32/versions.html
—
—
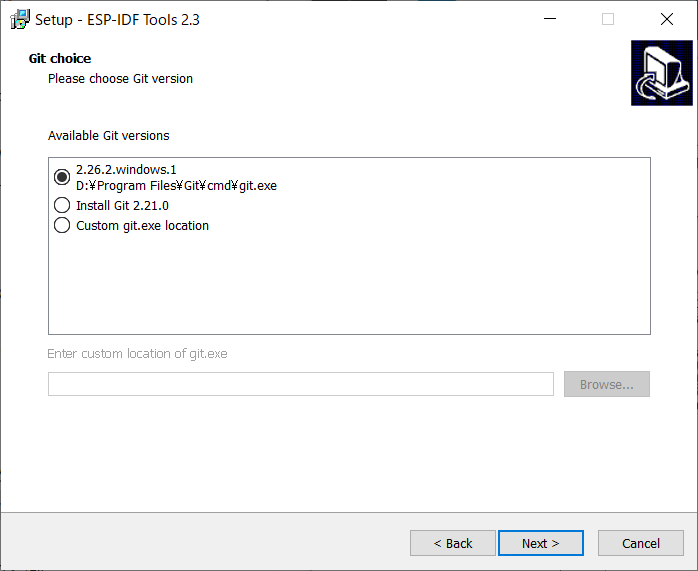
Git 環境をお持ちの方は git.exe PATH の選択または、Git 2.21.0 インスール可能です。ここでは既に導入済み 2.26.2.windows.1を指定しました。
cf, D:\Program Files\Git\cmd\git.exe
—
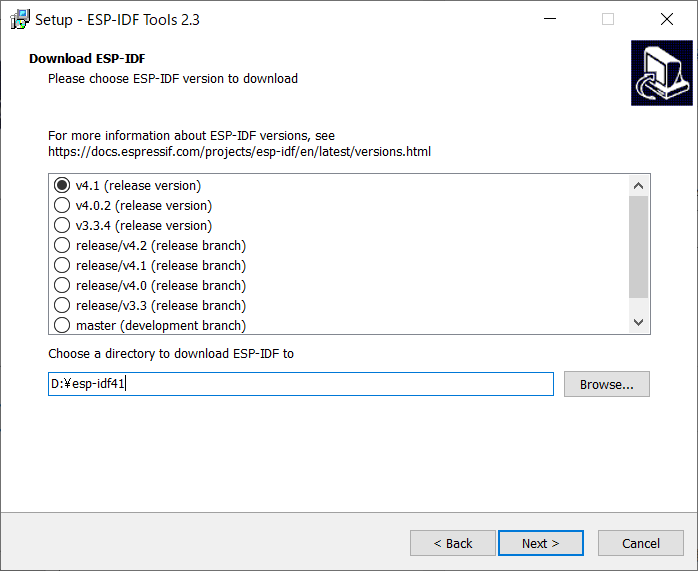
ESP-IDF 環境がないのでダウンロード&導入しました。

—
ESP-IDF バージョンとダウンロードパス指定
—
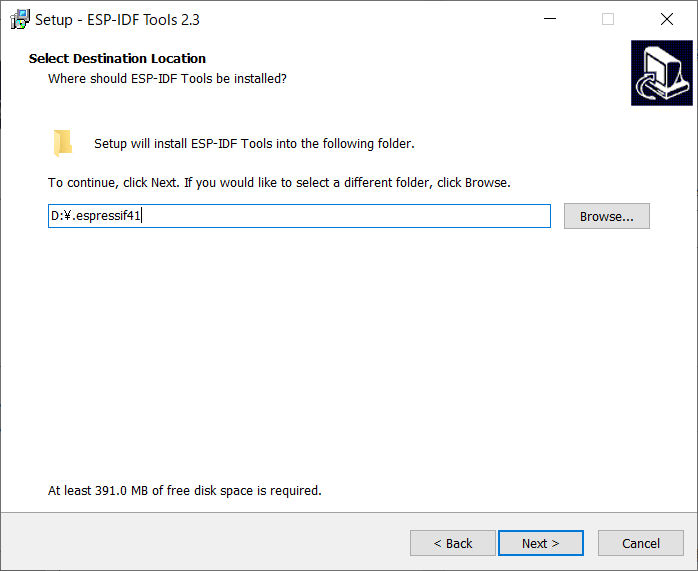
ESP-IDF Tools インストール先を指定します。
—
ESP-IDF インストール指定を確認して [Install] 押下です。
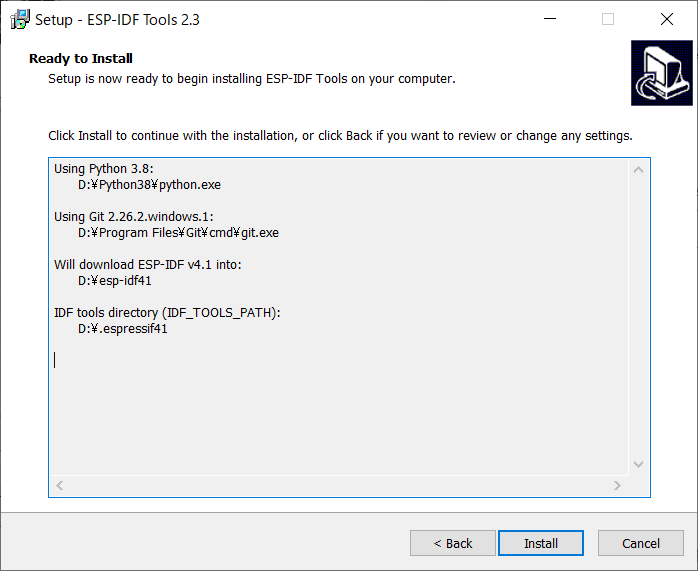
ここでは次の通りです。
Using Python 3.8:
D:\Python38\python.exe
Using Git 2.26.2.windows.1:
D:\Program Files\Git\cmd\git.exe
Will download ESP-IDF v4.1 into:
D:\esp-idf41
IDF tools directory (IDF_TOOLS_PATH):
D:.espressif41
—
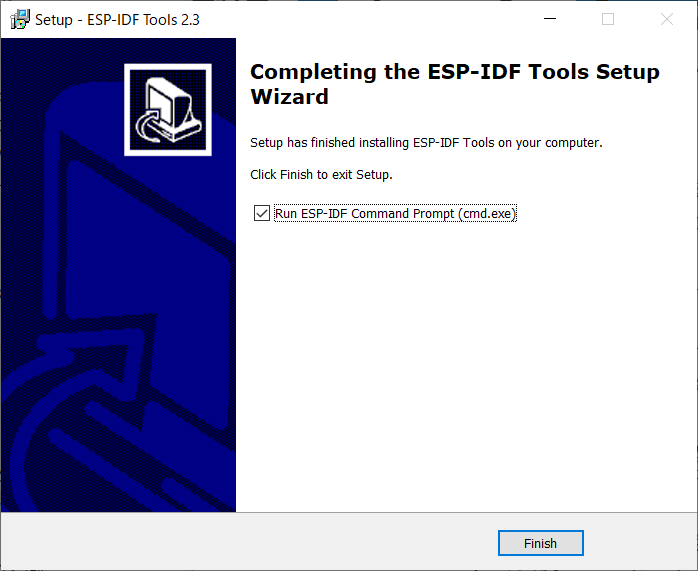
インストール完了。
ESP-IDF プロンプト動作
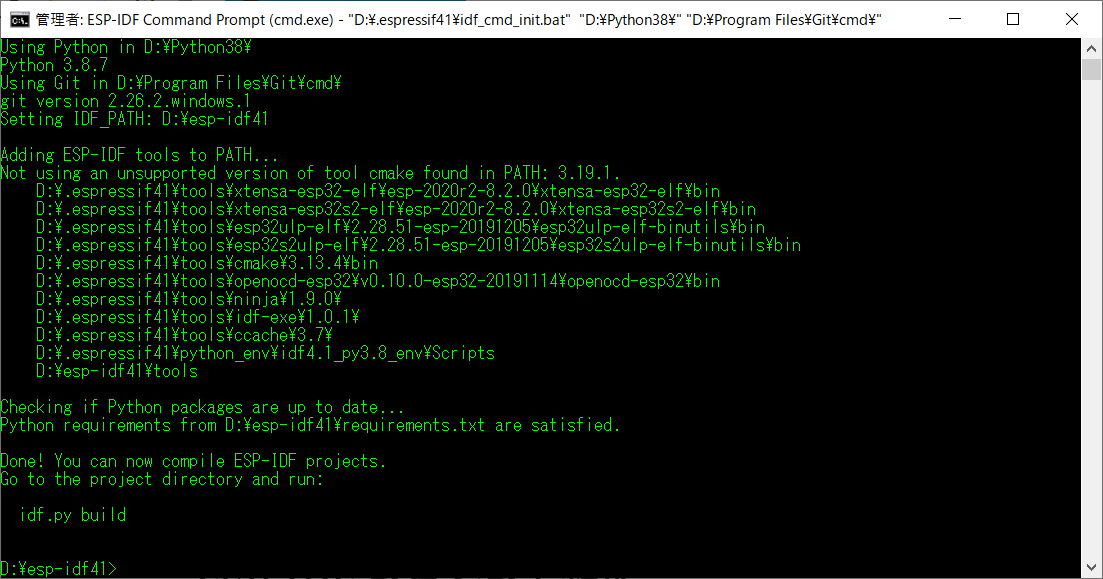
install.bat を実行します。
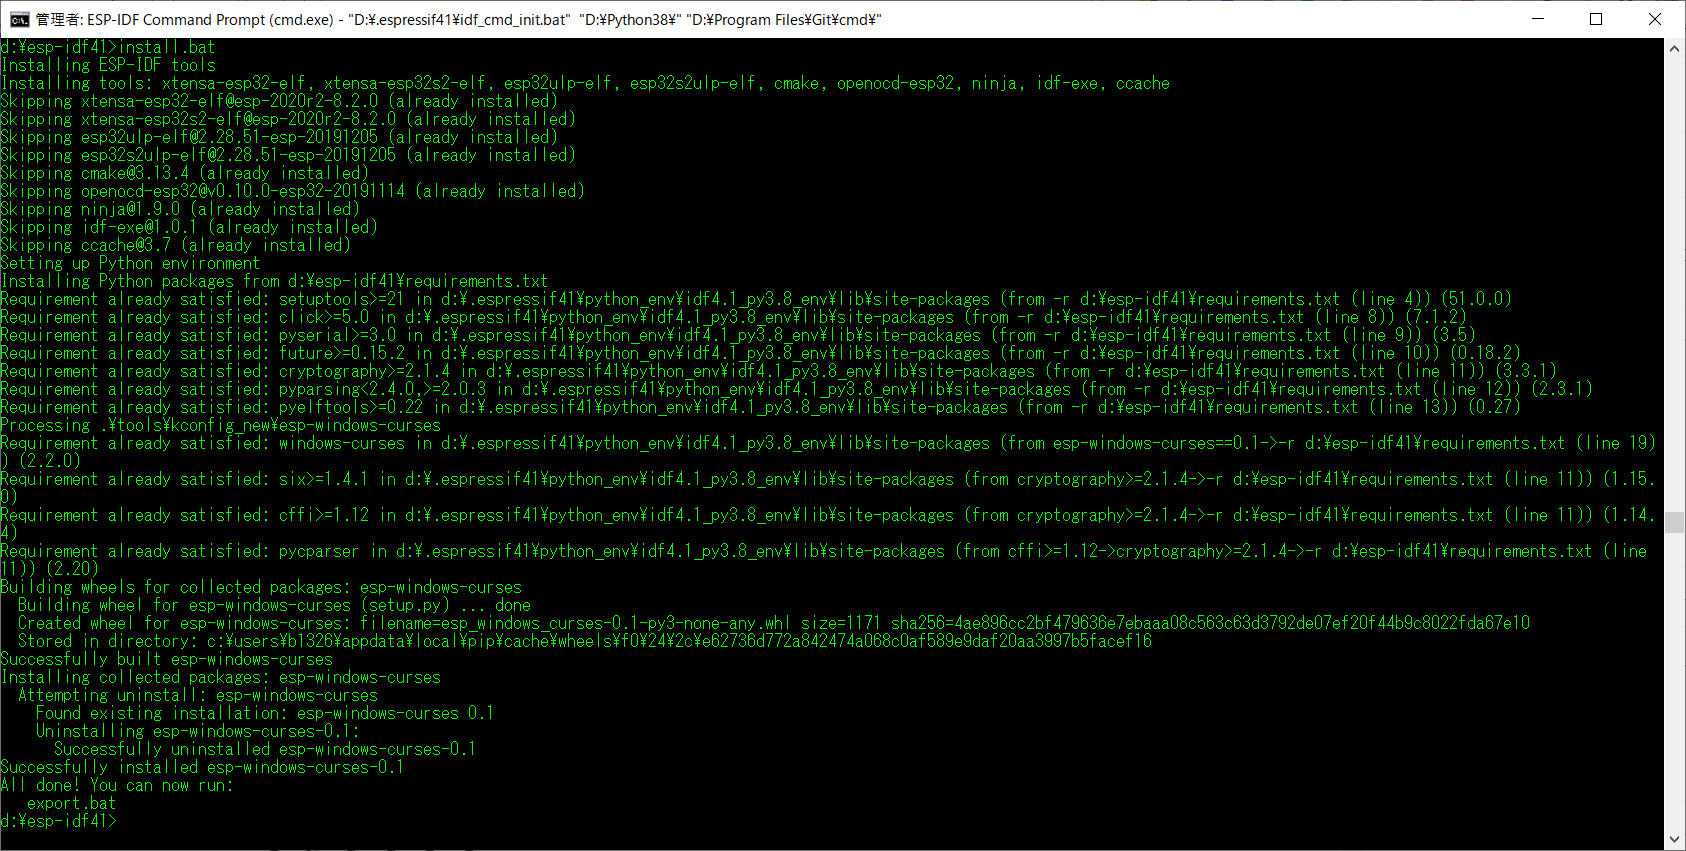
All done! You can now run:
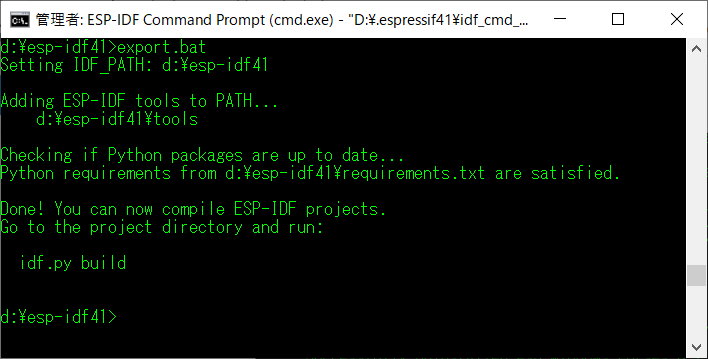
export.bat が表示されるので、続けましょう。
export.bat を実行します。
あとは、個別の開発プロジェクトディレクトリで ipf.py build を実行するだけ。
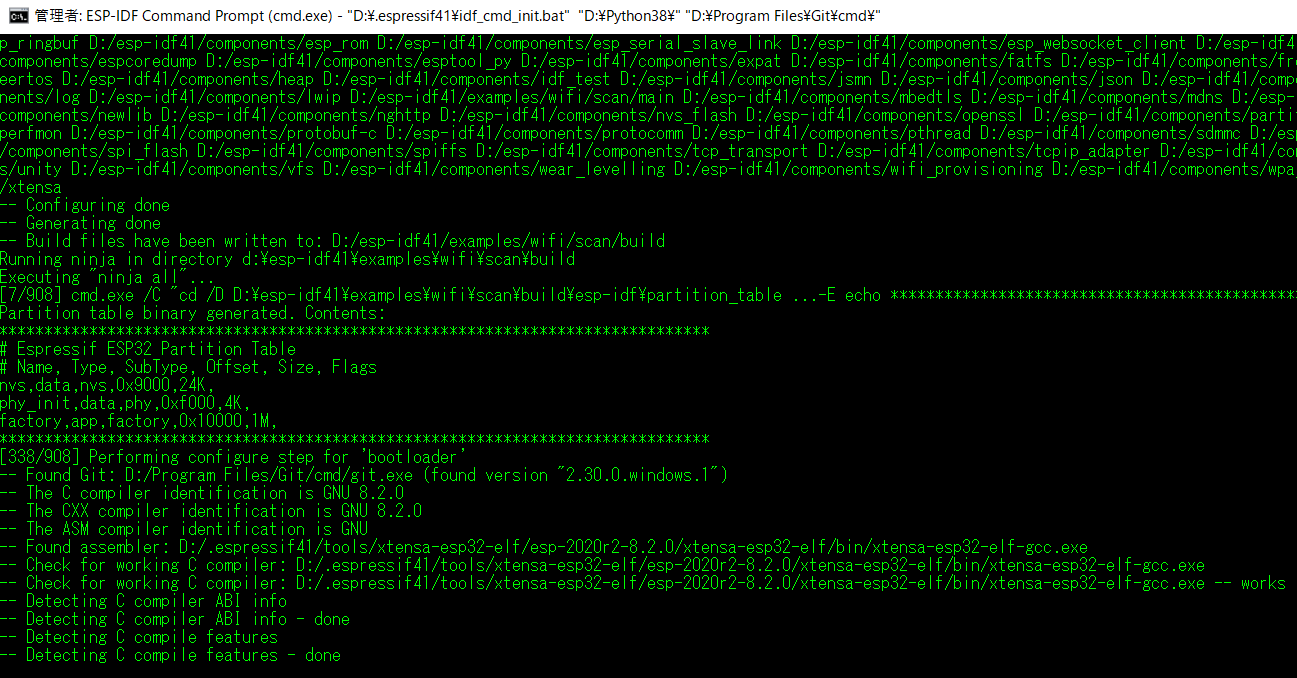
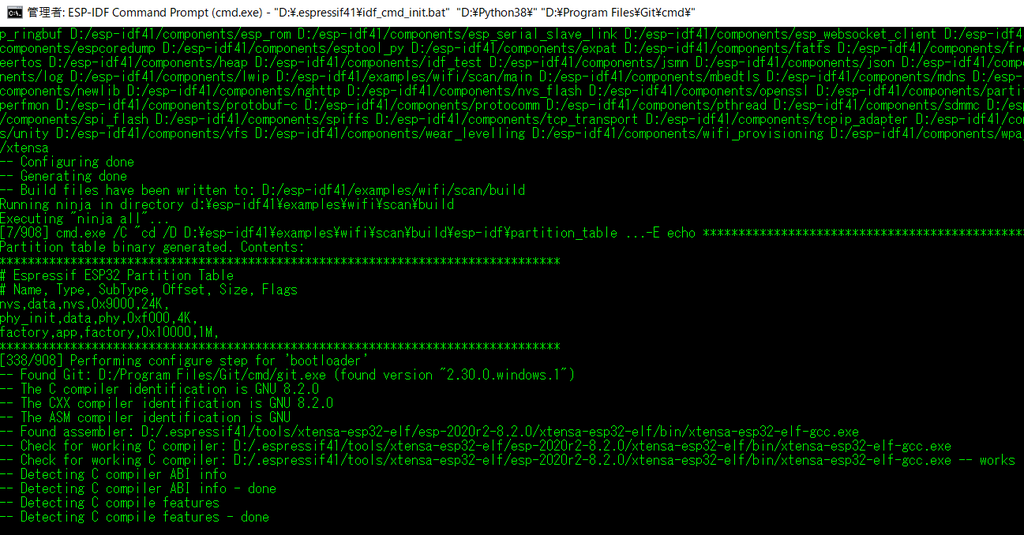
examples から wifi scan を例にプロジェクトビルド「ipf.py build」確認します。(他の例でも良いでしょう)
例: d:\esp-idf41\examples\wifi\scan>idf.py all
→ cmake 対象ディレクトリは d:\esp-idf41\examples\wifi\scan\build です。
生成されるもの:ESP32 ブートローダー等
Espressif ESP32 Partition Table も流れるように表示されます(別途、ログスイッチで記録可能)。
#Espressif ESP32 Partition Table
#Name, Type, SubType, Offset, Size, Flags
nvs,data,nvs,0x9000,24K,
phy_init,data,phy,0xf000,4K,
factory,app,factory,0x10000,1M,
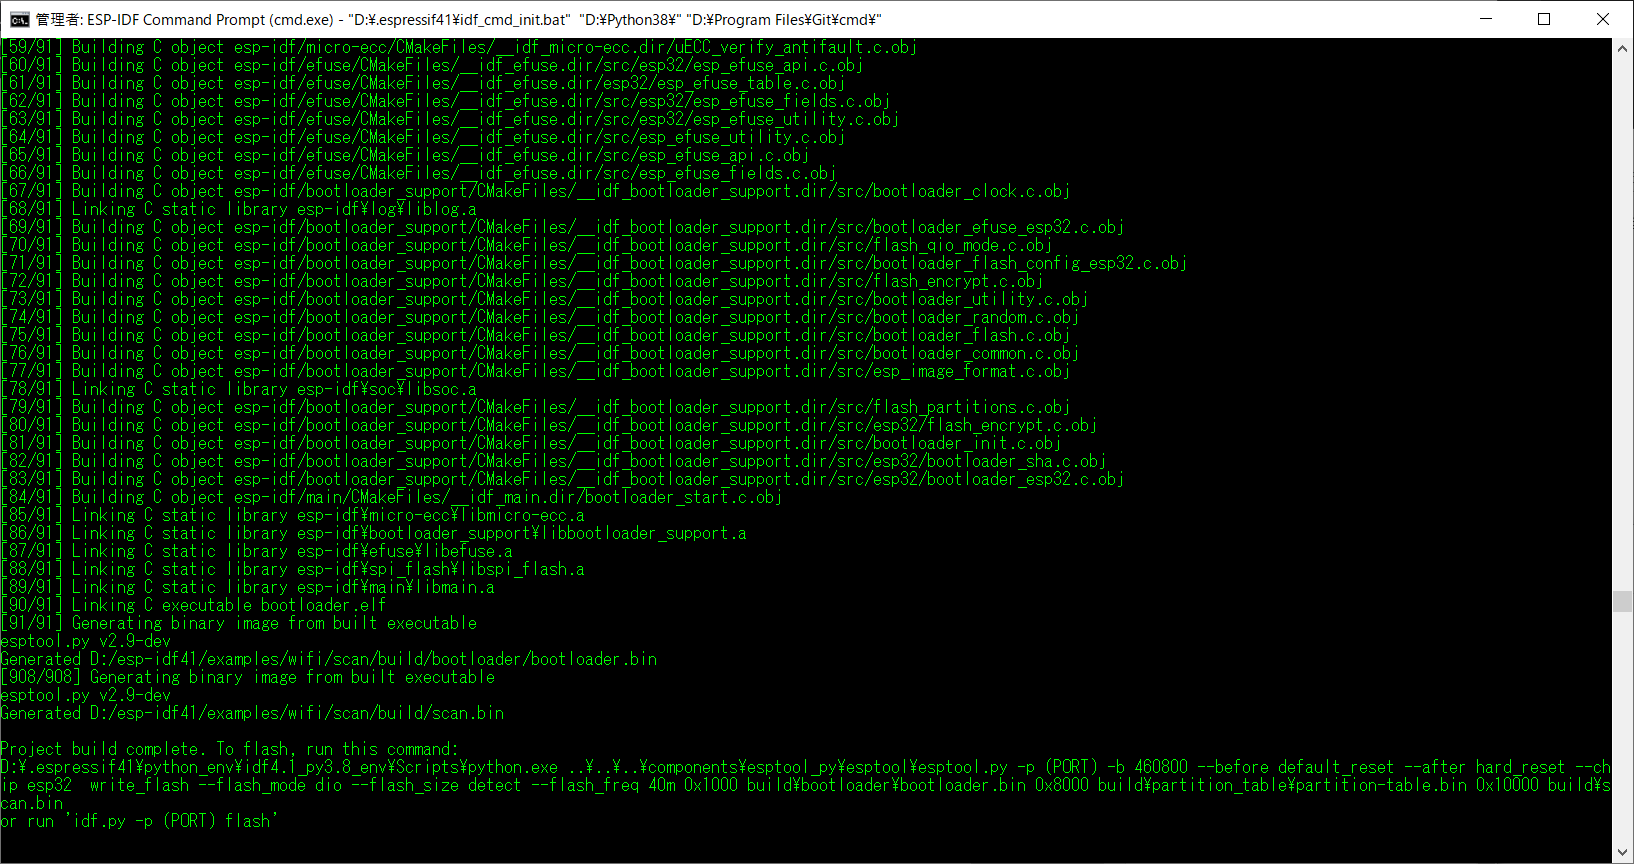
正常終了の確認をしましょう。
↓
[91/91] Generating binary image from built executable
esptool.py v2.9-dev
Generated D:/esp-idf41/examples/wifi/scan/build/bootloader/bootloader.bin
[908/908] Generating binary image from built executable
esptool.py v2.9-dev
Generated D:/esp-idf41/examples/wifi/scan/build/scan.bin
Project build complete. To flash, run this command:
D:.espressif41\python_env\idf4.1_py3.8_env\Scripts\python.exe ……\components\esptool_py\esptool\esptool.py -p (PORT) -b 460800 –before default_reset –after hard_reset –chip esp32 write_flash –flash_mode dio –flash_size detect –flash_freq 40m 0x1000 build\bootloader\bootloader.bin 0x8000 build\partition_table\partition-table.bin 0x10000 build\scan.bin
or run ‘idf.py -p (PORT) flash’
無事完了しました。コマンドプロンプトでプロジェクトビルドを行いましたが、IDE (Visual Studio Code) でも同様のことが GUI で利用可能です。
以上、ご覧いただき有難うございました。